I’ve been asked several times how we go about planning a route, get it to the chart plotter and run it on the auto pilot, so I thought I’d share our process aboard Carol Ann. There are probably a dozen different ways to accomplish the same thing, but this is what we’ve been doing, and it works quite well for us.
We have a Garmin GPSMAP 8412 chartplotter and a Garmin autopilot, but I do all of my route planning on my iPad using Aqua Map. Particularly when traveling the ICW, I find Aqua Map to be a very useful tool.
One of the nice things about this setup is that I can create and fine-tune a route on the iPad and wirelessly transfer it to the Garmin. It’s actually a fairly simple process once you know how to do it.
Here’s how I go about it.
Why I Use Aqua Map
Two of the biggest reasons I use Aqua Map for route planning on the ICW are the US Army Corps of Engineers (USACE) surveys and the Bob423 tracks.
The USACE regularly surveys many of the more problematic areas along the ICW. Aqua Map overlays these surveys directly onto the navigation charts, giving you a color-coded view of the actual surveyed depths. This is particularly useful in areas where shoaling is an ongoing problem and the depths shown on the regular navigation charts may no longer be accurate.
For those not familiar with Bob423, Bob Sherer has spent years maintaining a set of tracks along the ICW. He continually updates these tracks based on new USACE surveys and depth information collected by other boaters. Aqua Map has the ability to automatically download and keep these tracks updated.
In the screenshots that follow, the colored shading in the channel is the USACE survey data, and the dashed blue line is the Bob423 track. The solid magenta line is the route I’m creating.
With our 4.5-foot draft, both of these features are particularly useful. Sometimes the deepest water isn’t where you’d expect it to be, and it isn’t always in the center of the marked channel.
I use both of these resources when creating and fine-tuning my routes. Of course, I also pay attention to the age of the survey, the tides, the actual channel markers and what our depth sounder is telling us. Things can and do change along the ICW.
Bob423 – Using Bob423 Tracks in Aqua Map
Route Planner Settings
Before getting into creating a route, it’s worth taking a look at the Route Planner settings in Aqua Map. These settings have quite a bit of influence on the routes it generates.
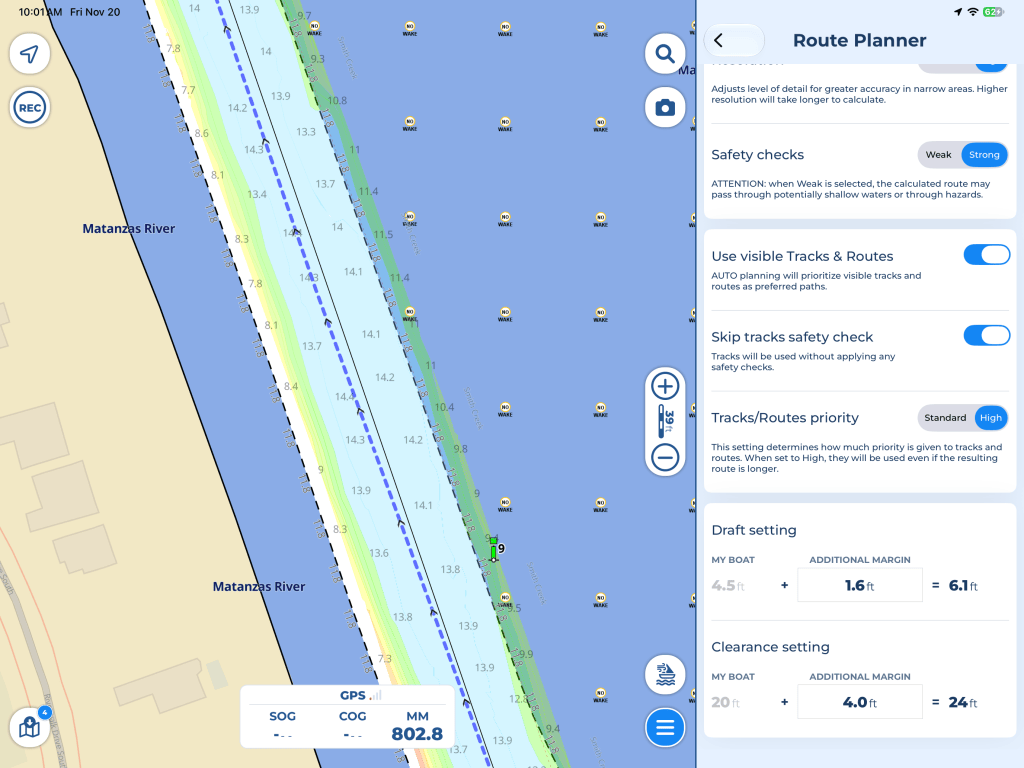
Here are the settings I’m currently using aboard Carol Ann:
- Safety checks – Strong
- Use visible Tracks & Routes – On
- Skip tracks safety check – On
- Tracks/Routes priority – High
- Draft – 4.5 feet, with an additional 1.6-foot margin
- Clearance – 20 feet, with an additional 4-foot margin
By enabling the use of visible tracks and setting their priority to High, Aqua Map will give preference to the Bob423 tracks, even if doing so results in a slightly longer route.
I also have “Skip tracks safety check” enabled. This allows Aqua Map to use existing tracks without applying its normal safety checks. One reason this can be useful is that the regular chart data may show shallow water in an area where more recent USACE surveys show plenty of water.
This does, however, make it particularly important to review the entire route yourself. You’ll also want to be aware of any other tracks or routes you have visible on your chart, as Aqua Map can use those as well.
These are the settings I’ve chosen for our boat and the type of cruising we do. Obviously, you’ll want to adjust the draft and clearance settings to suit your own boat.
I consider auto-routing a starting point rather than a finished product. I
Creating a Route in Aqua Map
For this example, I’m going to create a short route starting near Palm Coast, Florida, and heading south on the ICW.
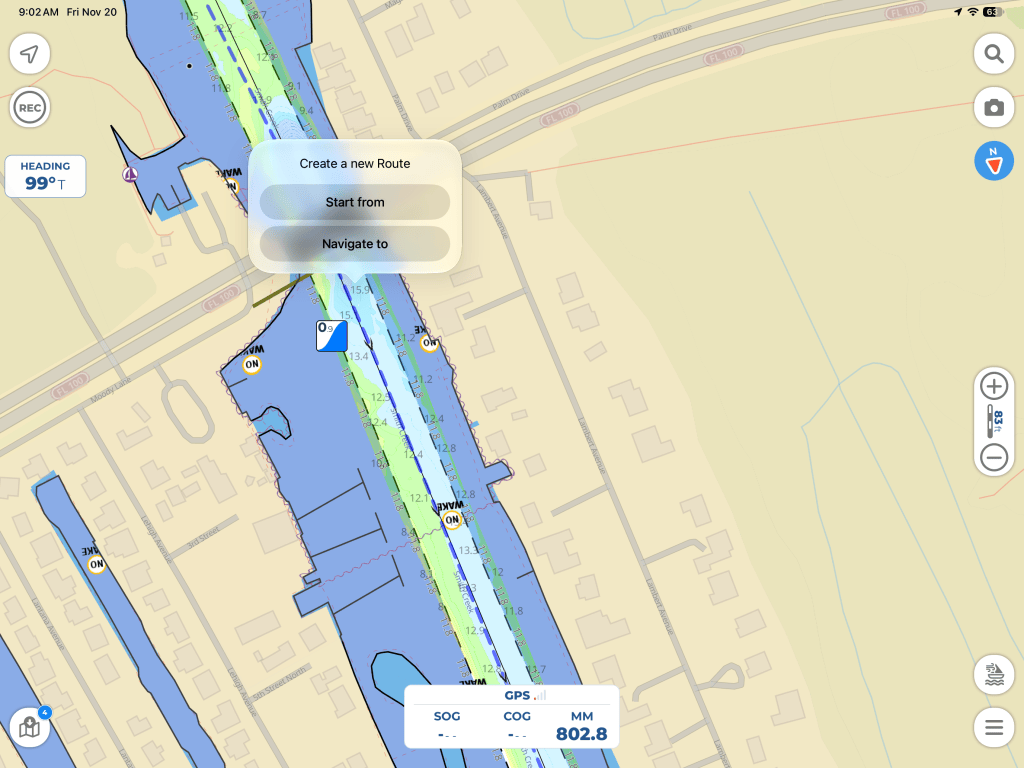
The first thing I do is zoom in on the chart to where I want my route to end. I generally start and end my routes out in the channel rather than at the dock. A long tap will bring up the “Create a new Route”.
Select the location where you want the route to end and choose “Navigate to” from the pop-up menu.
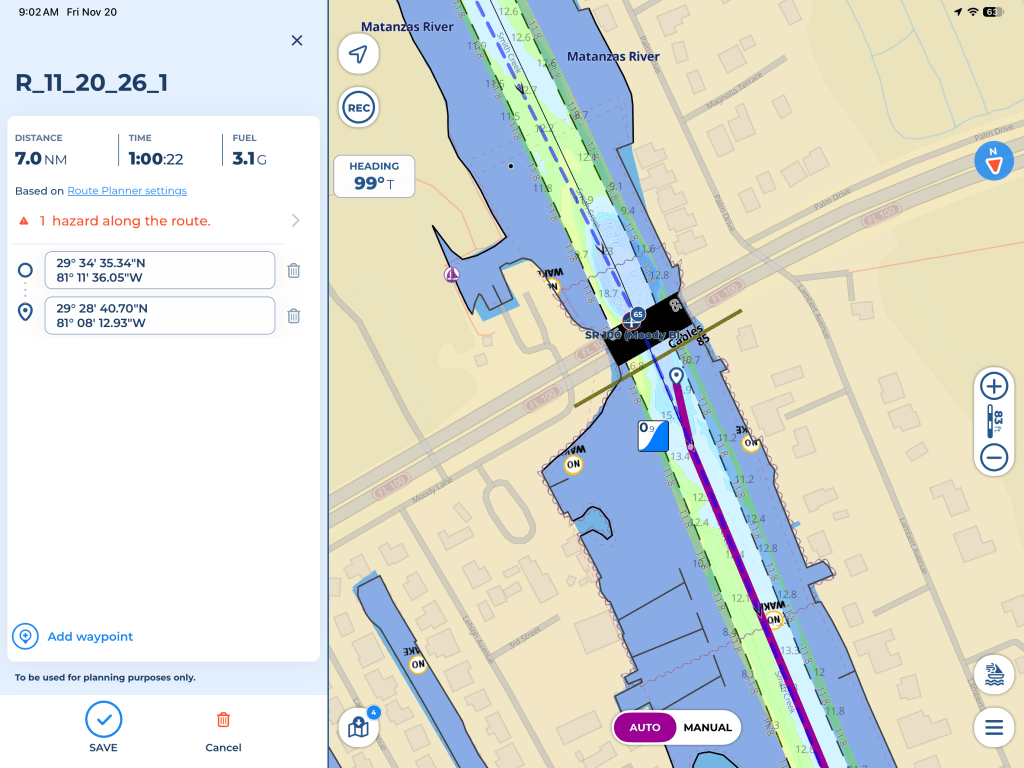
Make sure you have AUTO selected at the bottom of the screen. If you have MANUAL selected, tap AUTO, delete the route and do it again (red trash can at the bottom left).
With AUTO selected at the bottom of the screen, Aqua Map creates a route for you. It also gives you the distance, estimated travel time, estimated fuel consumption and any potential hazards along the route, based on the information you’ve entered in your Route Planner settings.
In this example, I’ve created a short, 7 NM route. Notice that Aqua Map has also identified a potential hazard along the route.
I use the auto-routing feature to do most of the work for me, but I don’t necessarily agree with all of its routing decisions. I always zoom in and follow the entire route, making adjustments wherever I feel they’re needed.
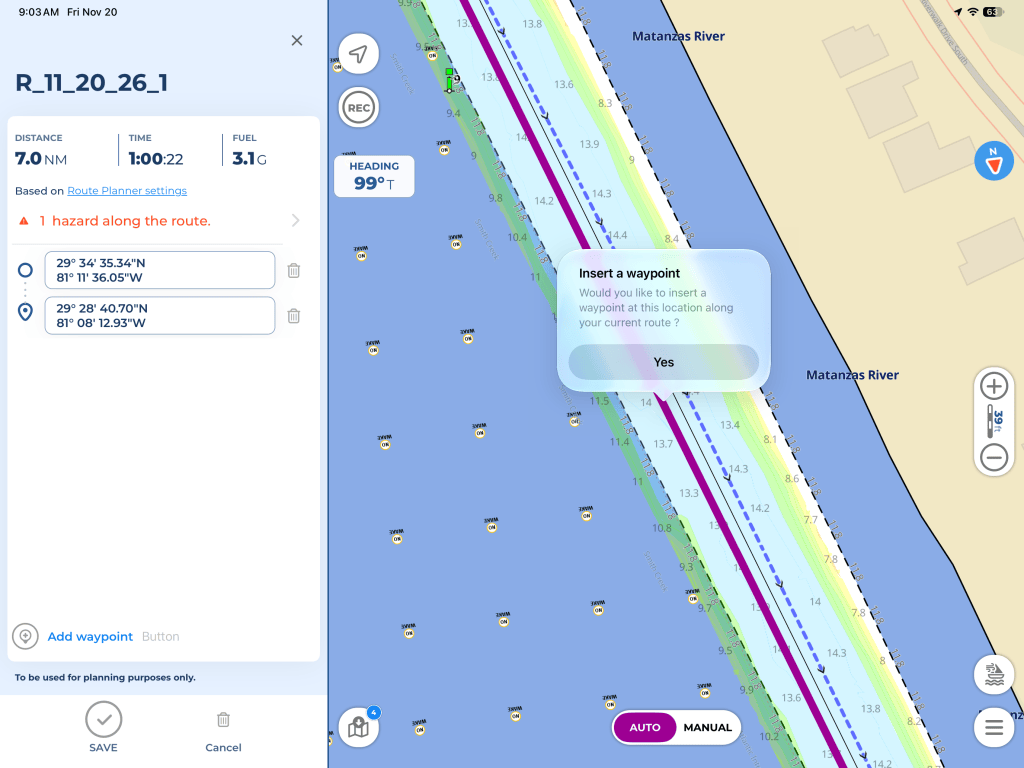
In this example, I’d prefer to move the route over a little. By selecting a point along the route, I can insert an additional waypoint.
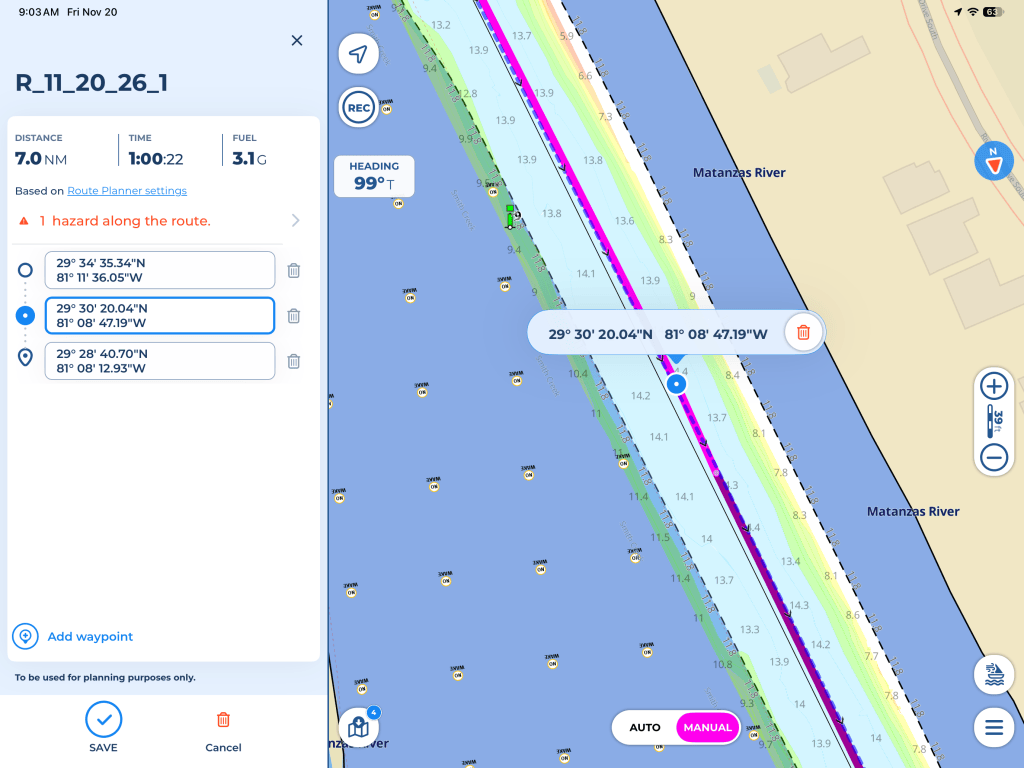
With MANUAL selected at the bottom of the screen, I can move the waypoint to where I’d prefer the route to go.
I’ll repeat this process as many times as necessary until I’m satisfied with the entire route. Auto-routing is a great time saver, but it’s no substitute for actually looking at the charts. I also review any hazard warnings before saving the route.
Saving the Route
Once I’ve gone over the entire route, reviewed the hazard warnings and made any adjustments I feel are necessary, I’m ready to save it.
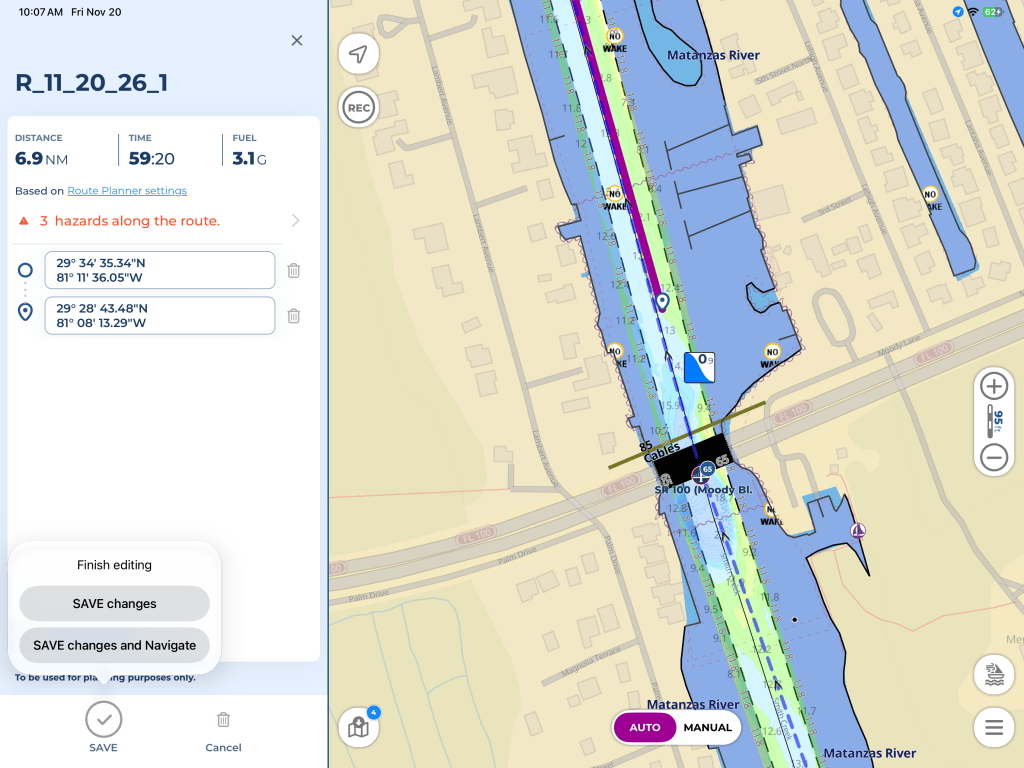
Tap SAVE at the bottom left of the screen. Aqua Map gives you two options, “SAVE changes” or “SAVE changes and Navigate.”
Since I’m using Aqua Map for route planning and the Garmin for navigation, I simply select “SAVE changes.”
Aqua Map automatically assigns a name to the route based on the date it was created. I prefer to give my routes more descriptive names, making them easier to find later, both in Aqua Map and on the Garmin.
Naming the Route
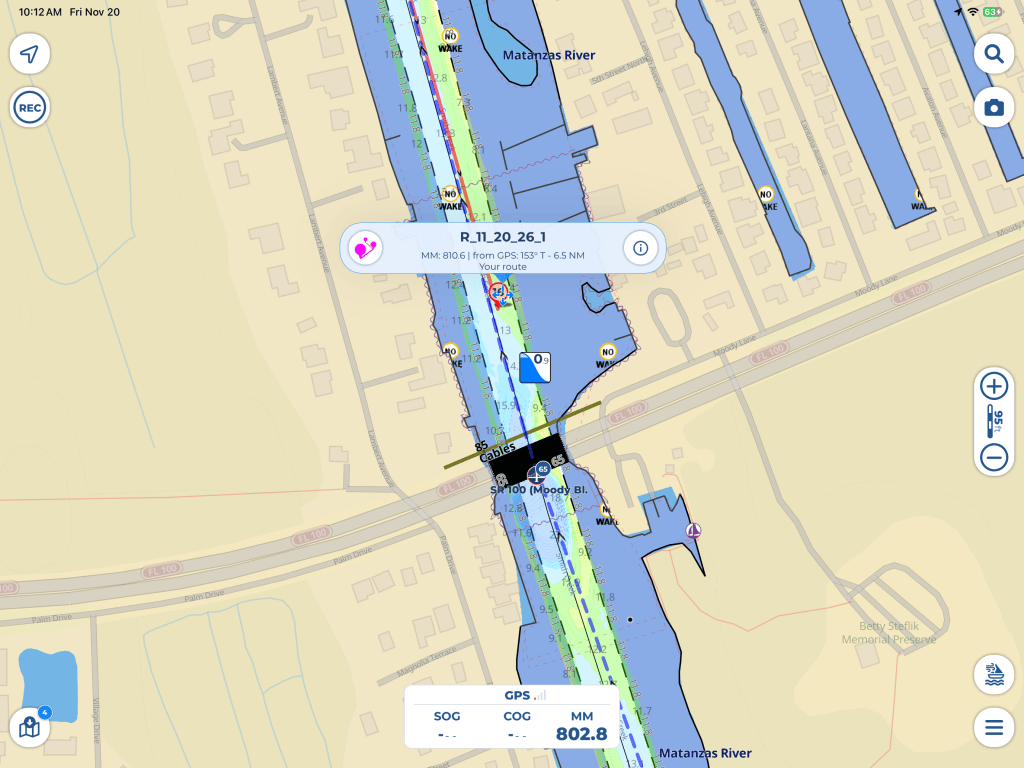
Once the route has been saved, tap on the route anywhere along its length. Aqua Map will display a pop-up showing the name of the route, along with some additional information.
Tap the information icon (the small “i” on the right side of the pop-up) to bring up the route details.
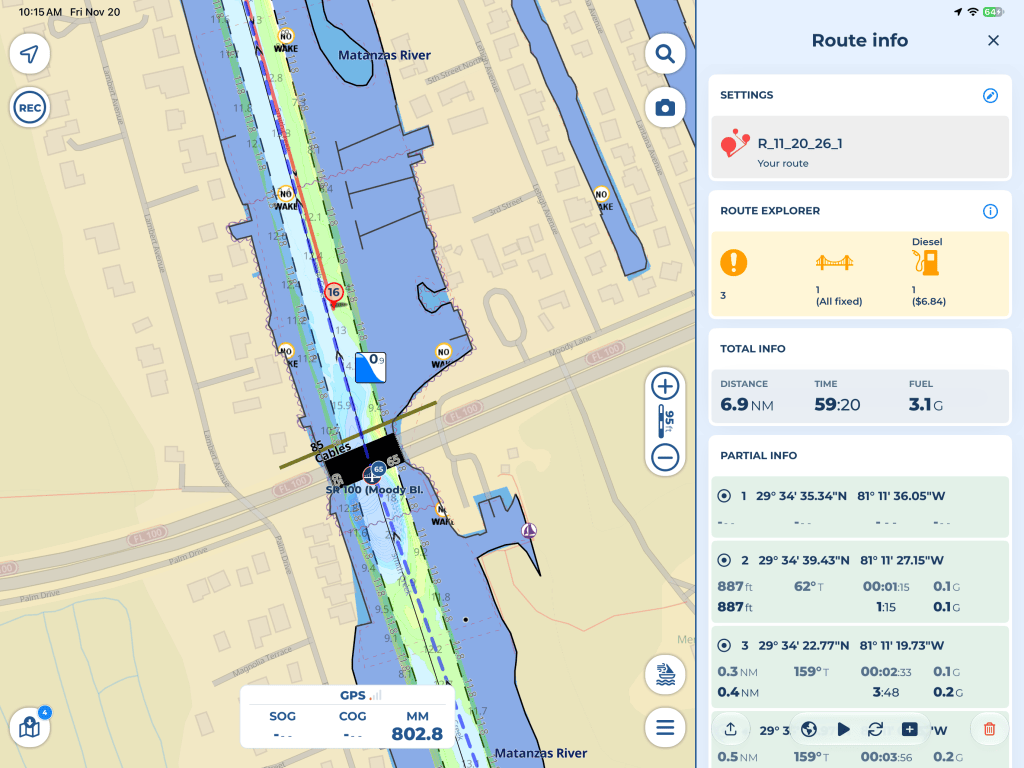
This brings up the Route info screen, which provides quite a bit of useful information about the route, including bridges, potential hazards, fuel stops, total distance, estimated travel time and fuel consumption.
It also gives you a breakdown of each individual leg of the route.
To change the name of the route, tap the small pencil icon to the right of SETTINGS at the top of the screen.
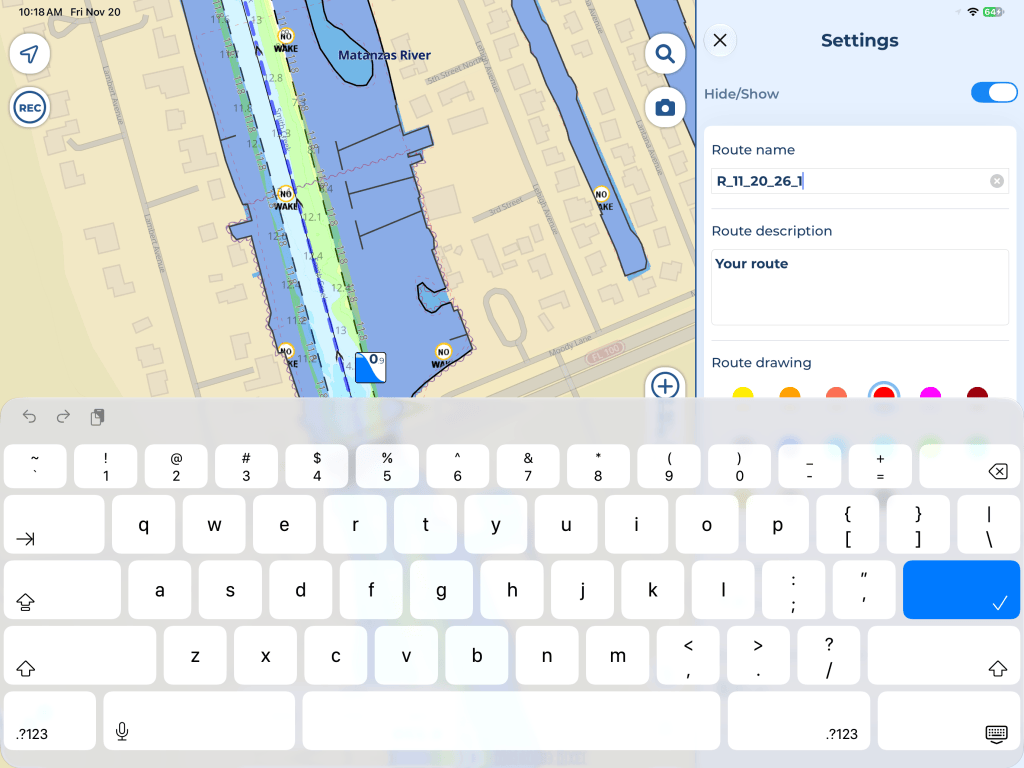
Here you can change the name of the route, add a description and even change the color of the route line on the chart.
One thing to be aware of when naming your routes is that the Garmin limits the number of characters in a route name. If the name is too long, the Garmin will truncate it.
For this reason, I generally put the destination first when naming my routes. After all, when I’m looking for a route on the Garmin, I’m typically more interested in where I’m going than where I’m coming from.
Once I’ve renamed the route, I’m ready to export it.
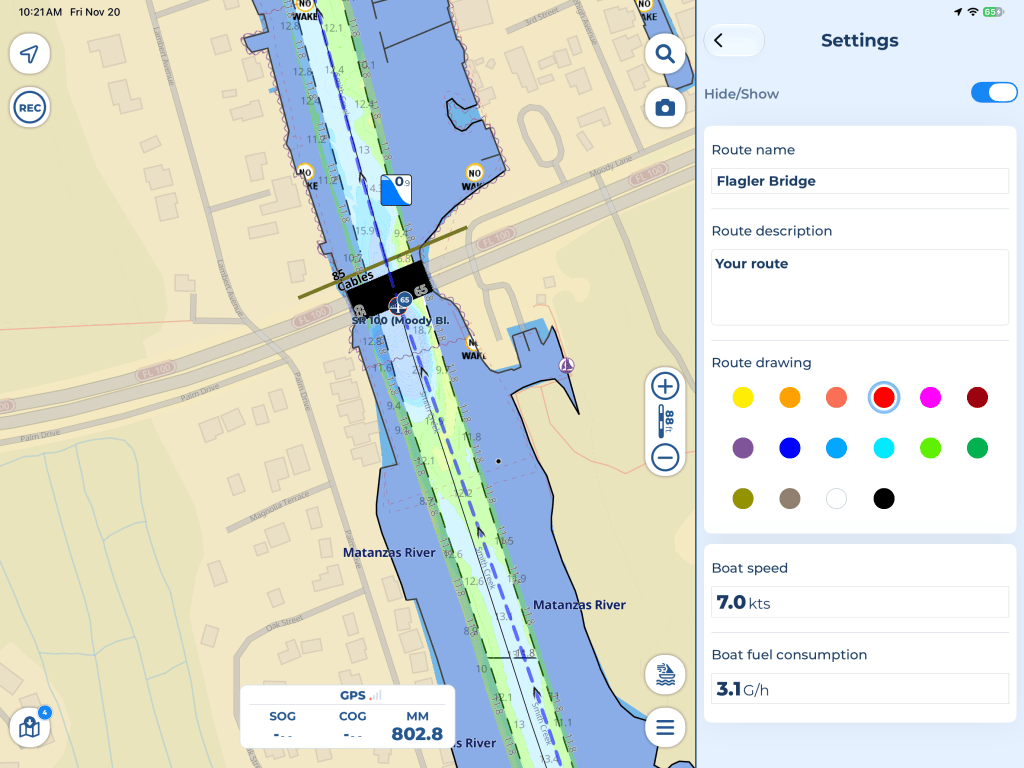
Now that I’ve created, fine-tuned and named the route, I’m ready to export it. For this example, I’ve named the route “Flagler Bridge.”
Back on the Route info screen, tap the share icon at the bottom left of the panel.
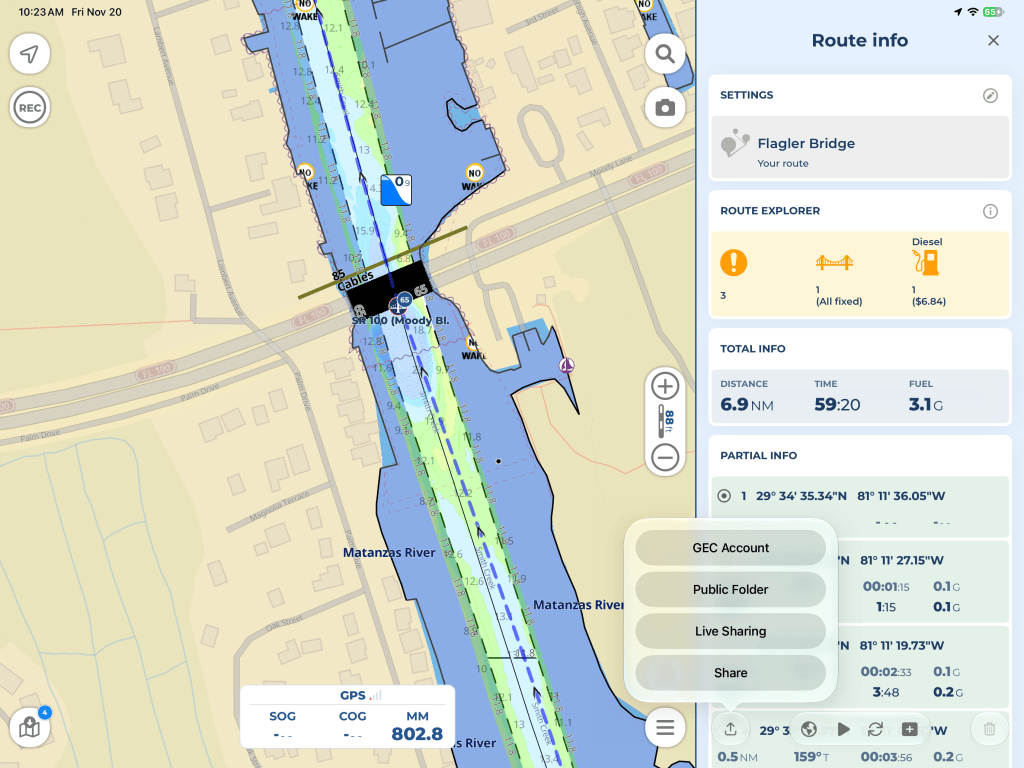
This brings up four options: GEC Account, Public Folder, Live Sharing and Share.
The first thing I do is save a copy of the route to my GEC (Global Exchange Community) account. This gives me an online backup of my route and makes it available for future use, including on other devices running Aqua Map.
Select “GEC Account” from the pop-up menu.
Transferring the Route to Garmin ActiveCaptain
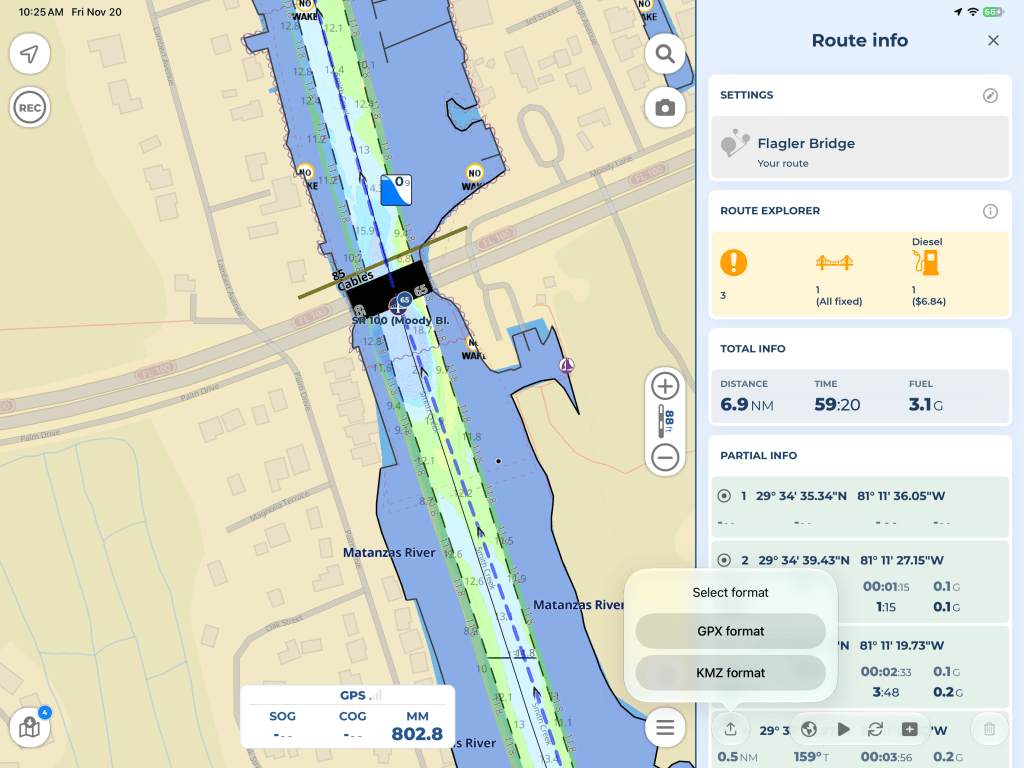
Now that I’ve saved a copy to my GEC account, I go back to the share icon, but this time I select “Share” from the pop-up menu and choose GPX as the file format.
GPX (GPS Exchange Format) is a common file format used to transfer routes, tracks and waypoints between different navigation programs.
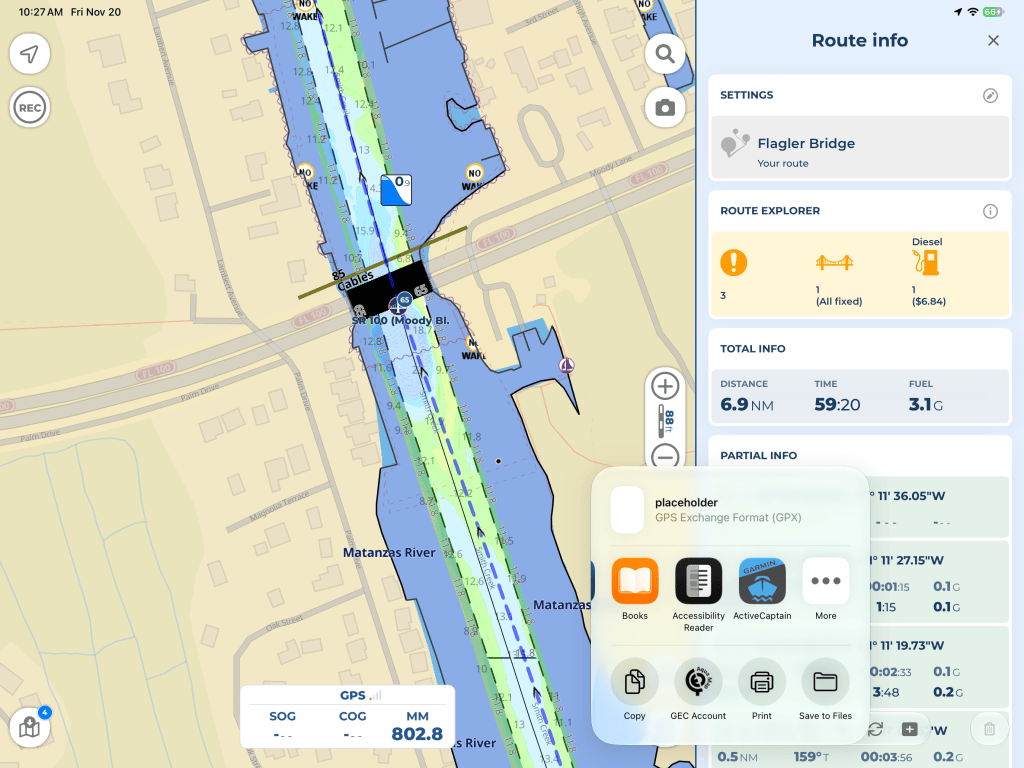
This brings up the iPad’s sharing menu. Select the Garmin ActiveCaptain app from the list of available apps. If you don’t see ActiveCaptain, you may need to tap “More” to find it.
Of course, you need to have the Garmin ActiveCaptain app installed and set up on your iPad before doing this.
Saving the route to your GEC account in the previous step is entirely optional. It’s just something I like to do so I have a backup of all my routes.
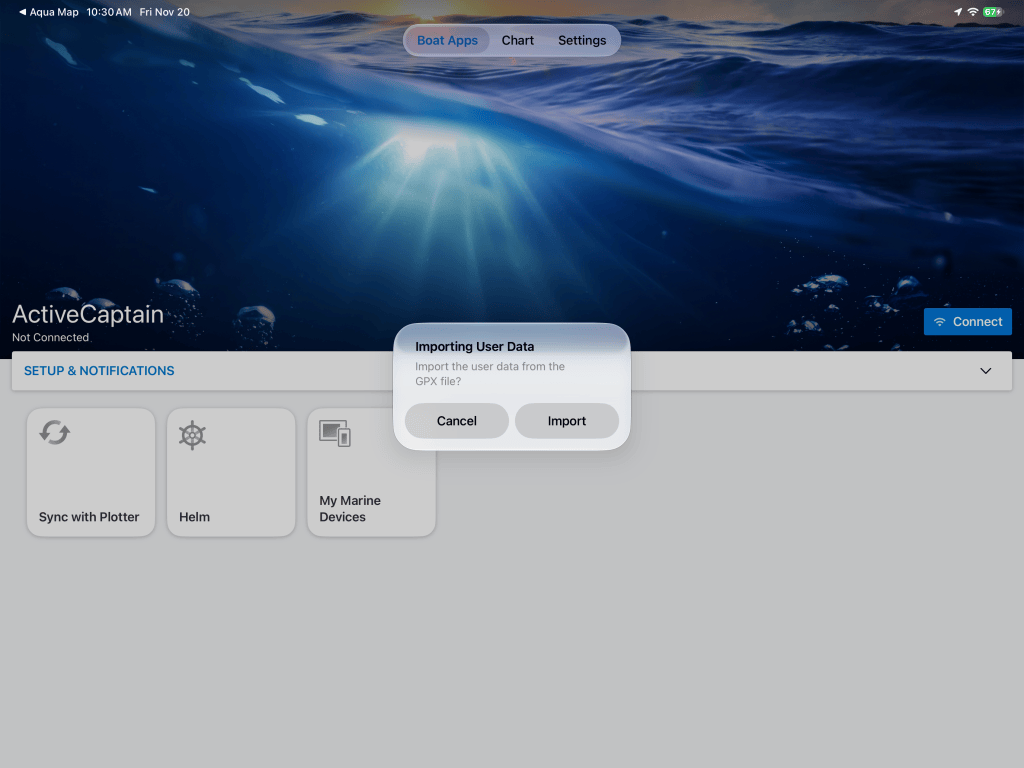
ActiveCaptain will automatically open and ask if you want to import the user data from the GPX file. Simply select “Import.”
At this point, the route is being imported into ActiveCaptain, not directly into the Garmin chartplotter.
Notice that ActiveCaptain shows “Not Connected” on the left side of the screen. That’s because my iPad isn’t currently connected to the Garmin’s Wi-Fi network. You don’t need to be connected to the chartplotter to complete this step, which is nice if you’re doing your route planning away from the boat.
Transferring the Route to the Garmin Chartplotter
The final step is to get the route from ActiveCaptain onto the Garmin chartplotter.
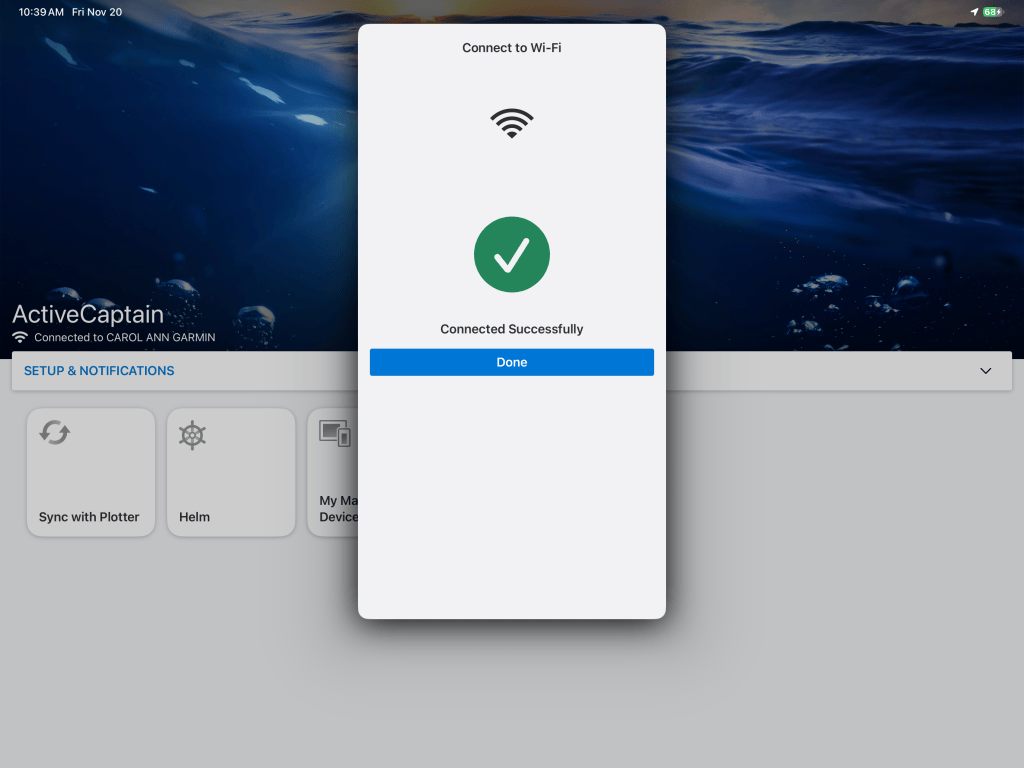
With the Garmin powered on, go into the Wi-Fi settings on the iPad and connect to the Garmin’s Wi-Fi network. In our case, I’ve named the network “CAROL ANN GARMIN.”
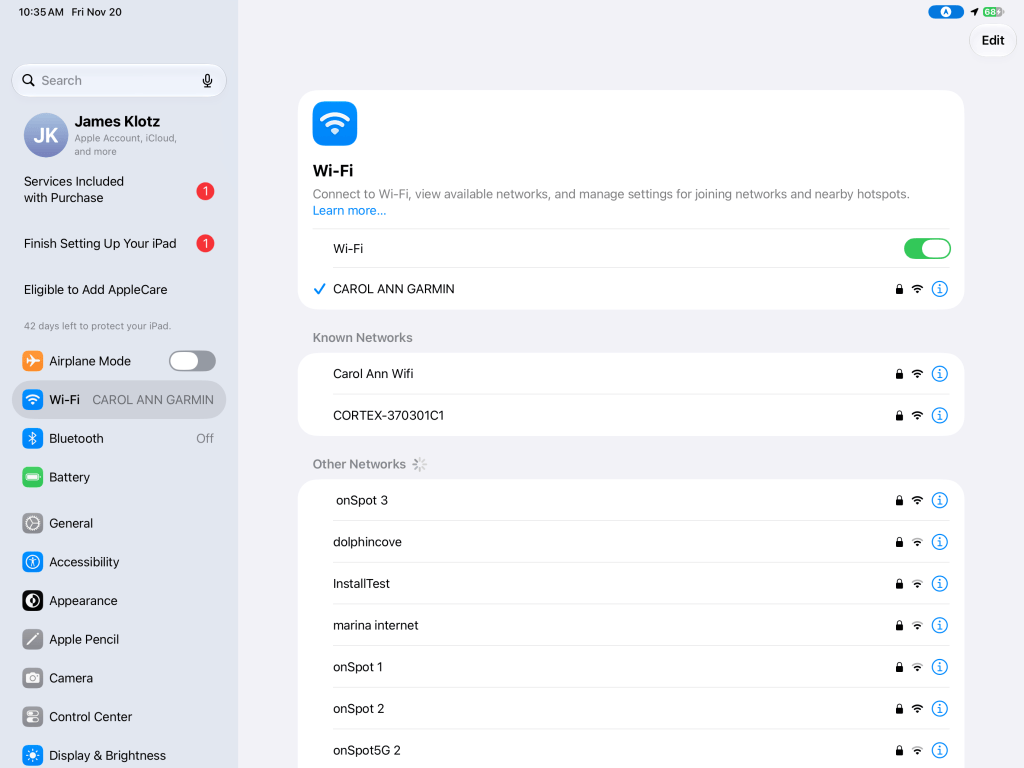
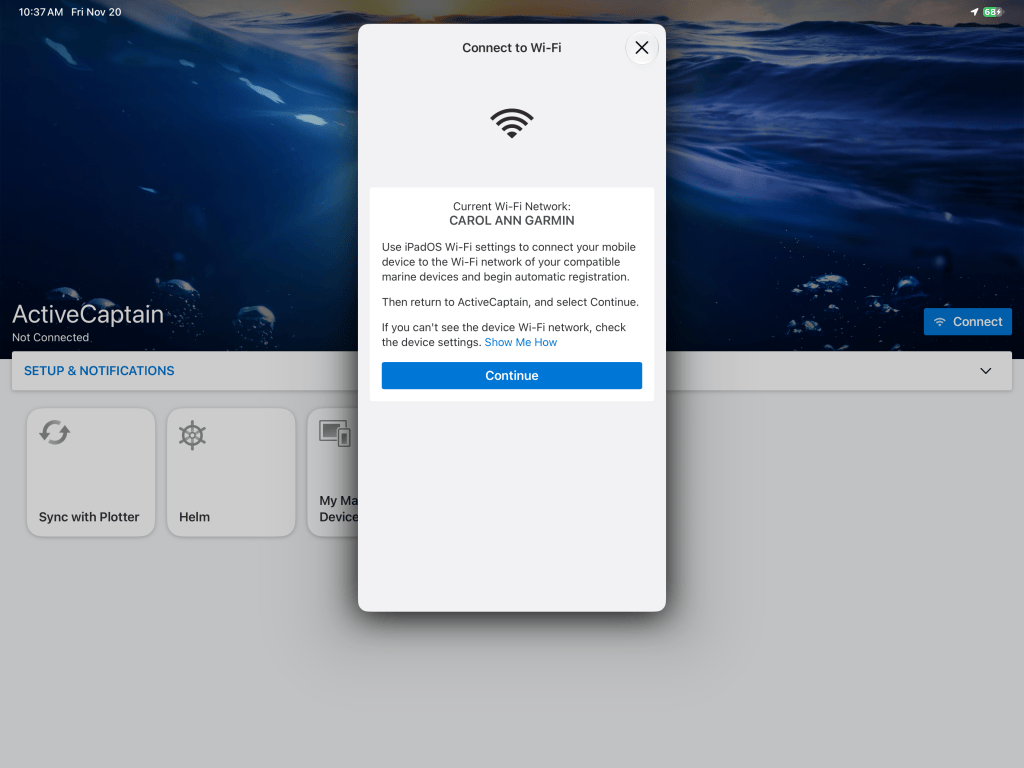
Once connected, go back into the ActiveCaptain app. ActiveCaptain will synchronize with the chartplotter and automatically transfer the new route.
There’s no need for an internet connection to do this, as the iPad is communicating directly with the Garmin over Wi-Fi.
Once the transfer is complete, I can reconnect the iPad to our boat’s regular Wi-Fi network.
Navigating the Route on the Garmin
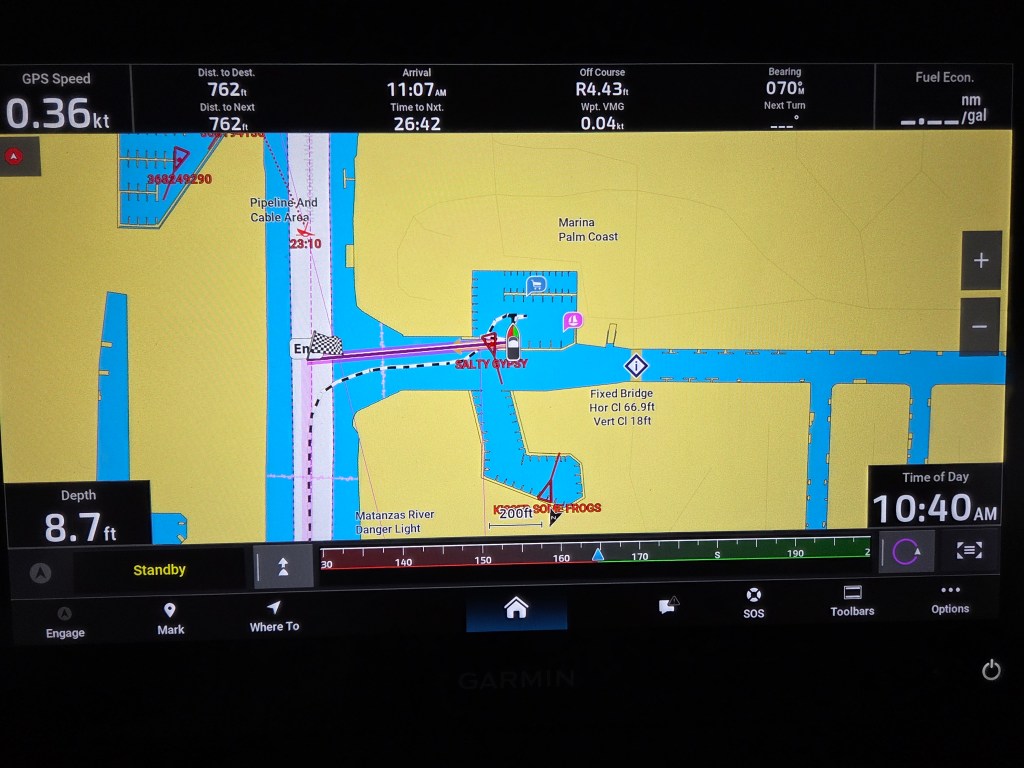
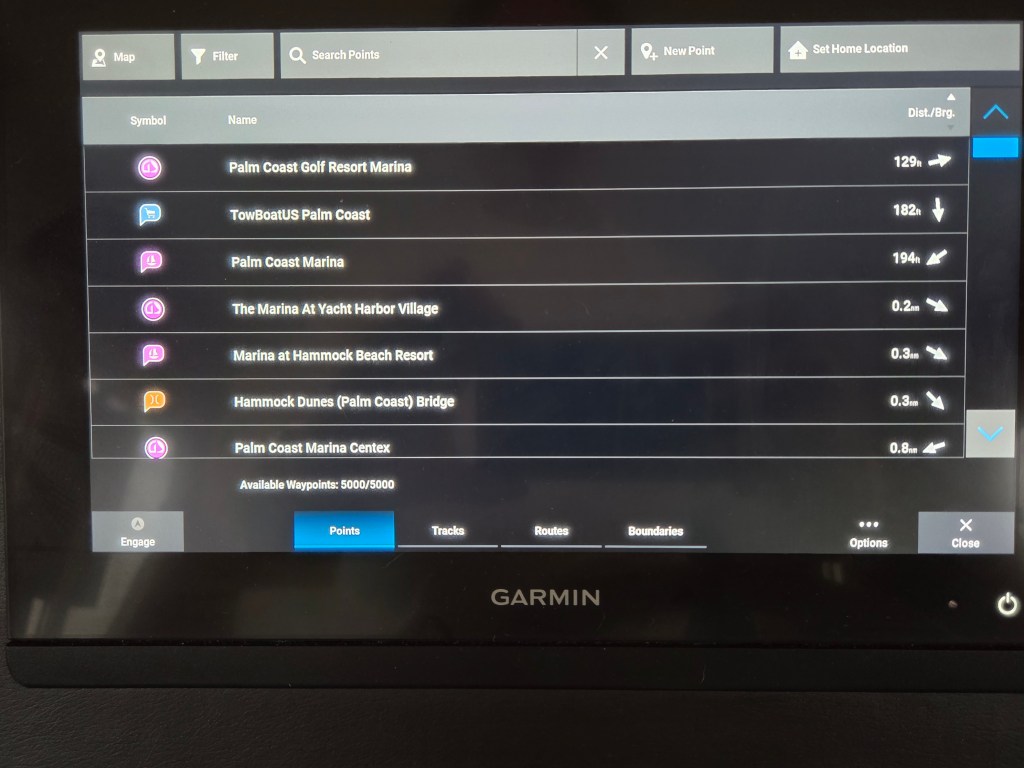
Now we can go to the list of saved routes on the Garmin chartplotter, where we should find our newly imported route. First, tap on “Where To”.
Next select “Routes” on the bottom of the screen.
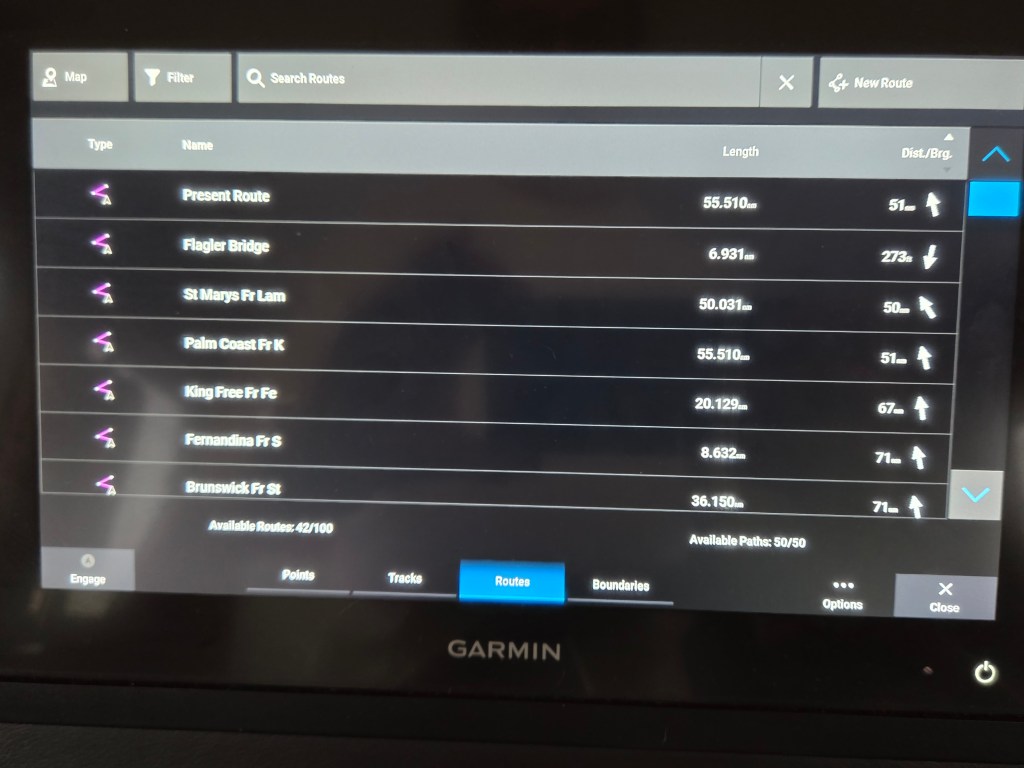
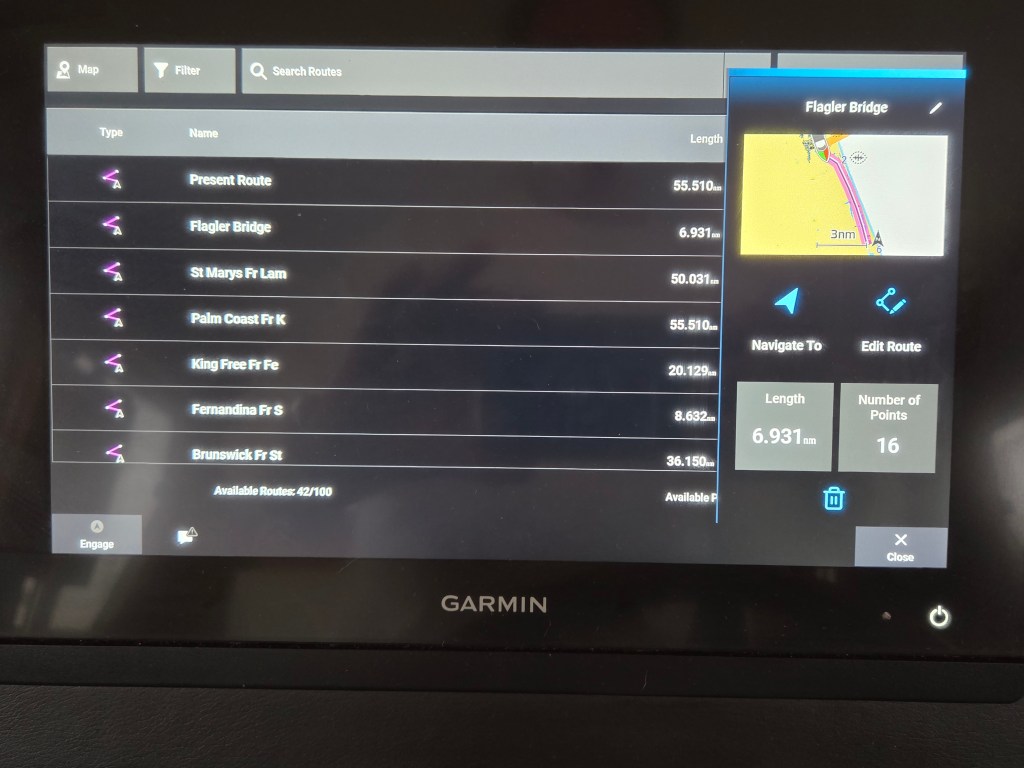
As you can see, our “Flagler Bridge” route is now on the Garmin. It’s 6.931 nautical miles long and contains 16 route points.
You can also see what I was referring to earlier about the Garmin truncating route names. This is why I put the destination first when naming my routes.
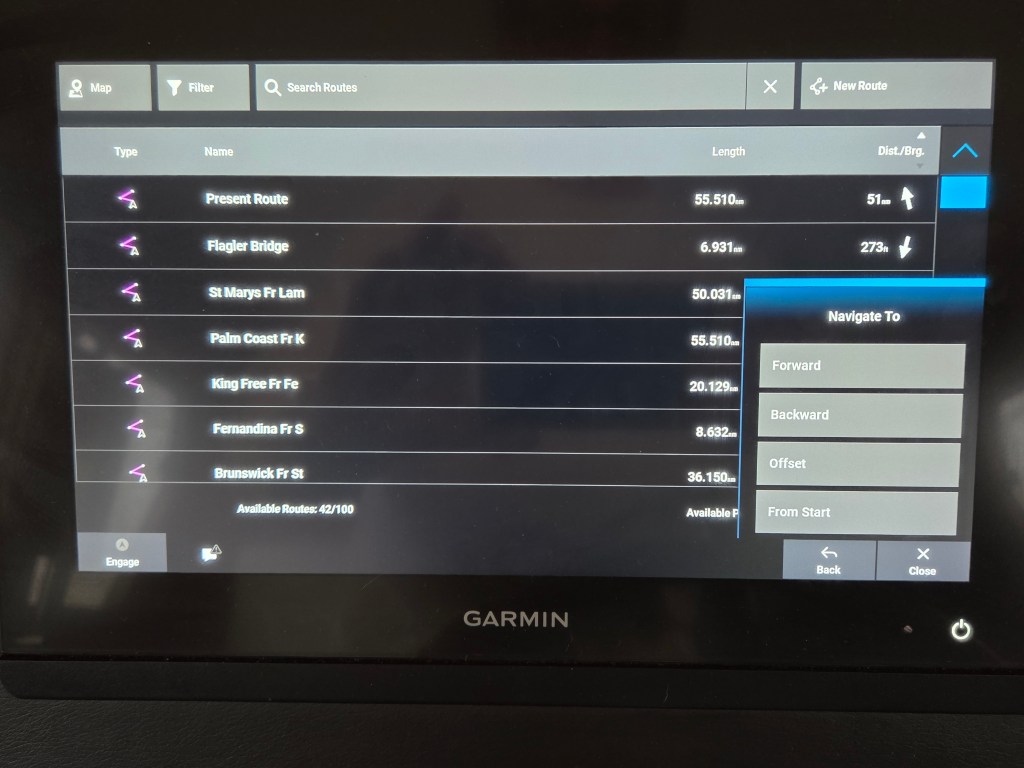
Select the route and tap “Navigate To.”
The Garmin gives you several options for navigating the route, including Forward, Backward, Offset and From Start. Select the appropriate option depending on your location and how you intend to join the route.
I normally select “Forward,” as I always hand steer the boat when leaving marinas and anchorages. I’m not particularly concerned with starting at the exact beginning of the route, as I’ll be manually steering the boat out into the channel anyway.
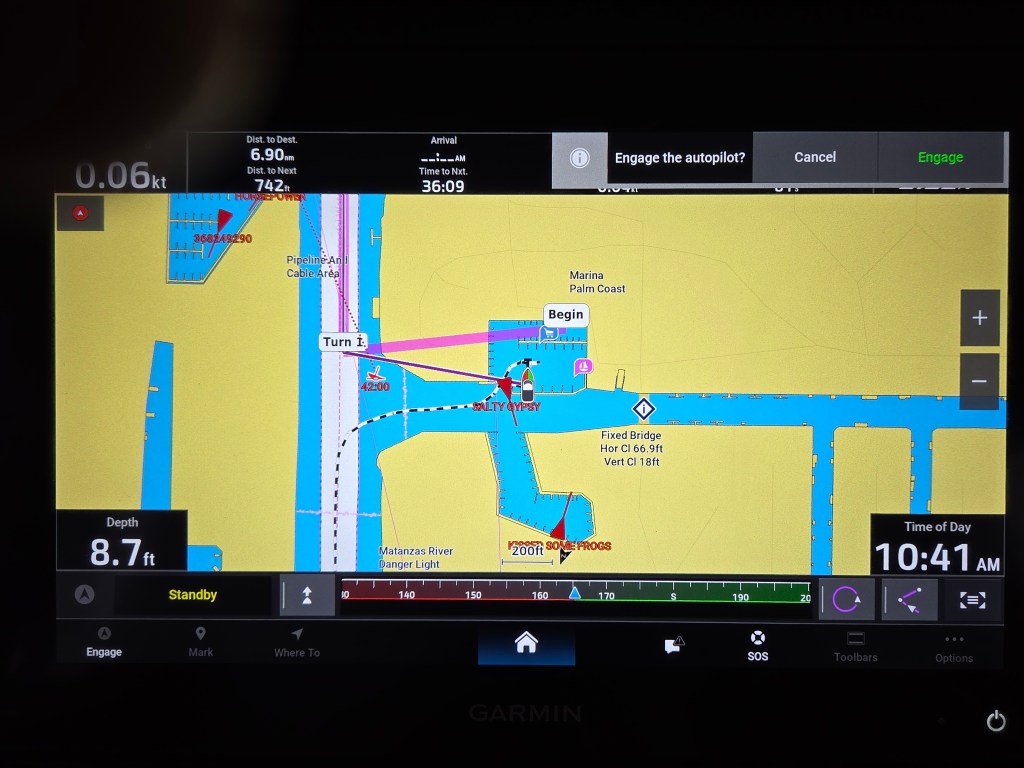
The Garmin now displays the active route on the navigation chart and, since we have an integrated Garmin autopilot, asks if we want to engage the autopilot.
I don’t engage the autopilot until we’re underway, clear of the marina and in a position to safely follow the route. I also check the imported route on the Garmin before using it, including how the Garmin intends to get us onto the route.
I always hand steer when entering or leaving marinas and anchorages, as well as when going through bridge openings. Once we’re clear and safely back on course, I’ll re-engage the autopilot.
Final Thoughts
This may seem like a lot of steps when looking at all these screenshots, but once you’ve done it a few times, it’s actually a pretty simple process. The vast majority of my time is spent reviewing and fine-tuning the route in Aqua Map. Getting it onto the Garmin takes very little time.
One of the nice things about doing my route planning on the iPad is that I can sit on the couch in the salon the night before, plan the next day’s run, look at tides and currents, check for shallow areas and have everything ready to go in the morning.
I get the benefit of the USACE surveys and Bob423 tracks in Aqua Map, while still being able to use the Garmin chartplotter and autopilot for navigation.
Of course, none of this means I can sit back and let the boat drive itself. The route is a plan, and sometimes conditions dictate that we deviate from that plan. We still need to pay attention to the channel markers, boat traffic, depth sounder and, most importantly, what’s in front of us.
There are probably other ways to accomplish the same thing, but this is what we’ve been doing aboard Carol Ann, and it works quite well for us. If you use a different method, post it in the comments, I’d love to hear about it. Thanks for reading.


Leave a Reply